
Hi guys,
Last week I was on the phone with a fellow who followed the blog and was interested in making his own container - during our chat I realised just how out-of-date some of the information on here is so time for a new post as promised!
Paint Job
First up the container is no longer a nasty shade of brown (RAL 3009 ‘Red Oxide’) but a nice bright white. As the original paint job is still very good I opted for a basic coat of self priming Dulux Metalshield (vivid white) for cosmetic purposes. After giving the container a good clean I had a bit of trouble thinning it (more like 1:1) but a 4L can more or less covers the area required (had an extra can sitting around too). I prefer the matte look although it scuffs and dirties a bit easier, glossy would of been a harder wearing choice (and it will chalk with time). I will eventually give it another coat once funds allow and the container is relocated off a dirt road.
Window Install
The windows have finally arrived and have been installed which was relatively painless - the glossy powder coat (Duralloy pearl white) compliment the matte exterior nicely. They were shipped with a range of matching trims and external flanges to facilitate different install options - in the end I decided to use clip on external flanges directly mounted and siliconed to the RHS frame. Aside from a few small leaks from 3 days straight of rain the container is finally weather-sealed after some 1.5 years sitting in the elements! See a picture below of the new paint job and windows:
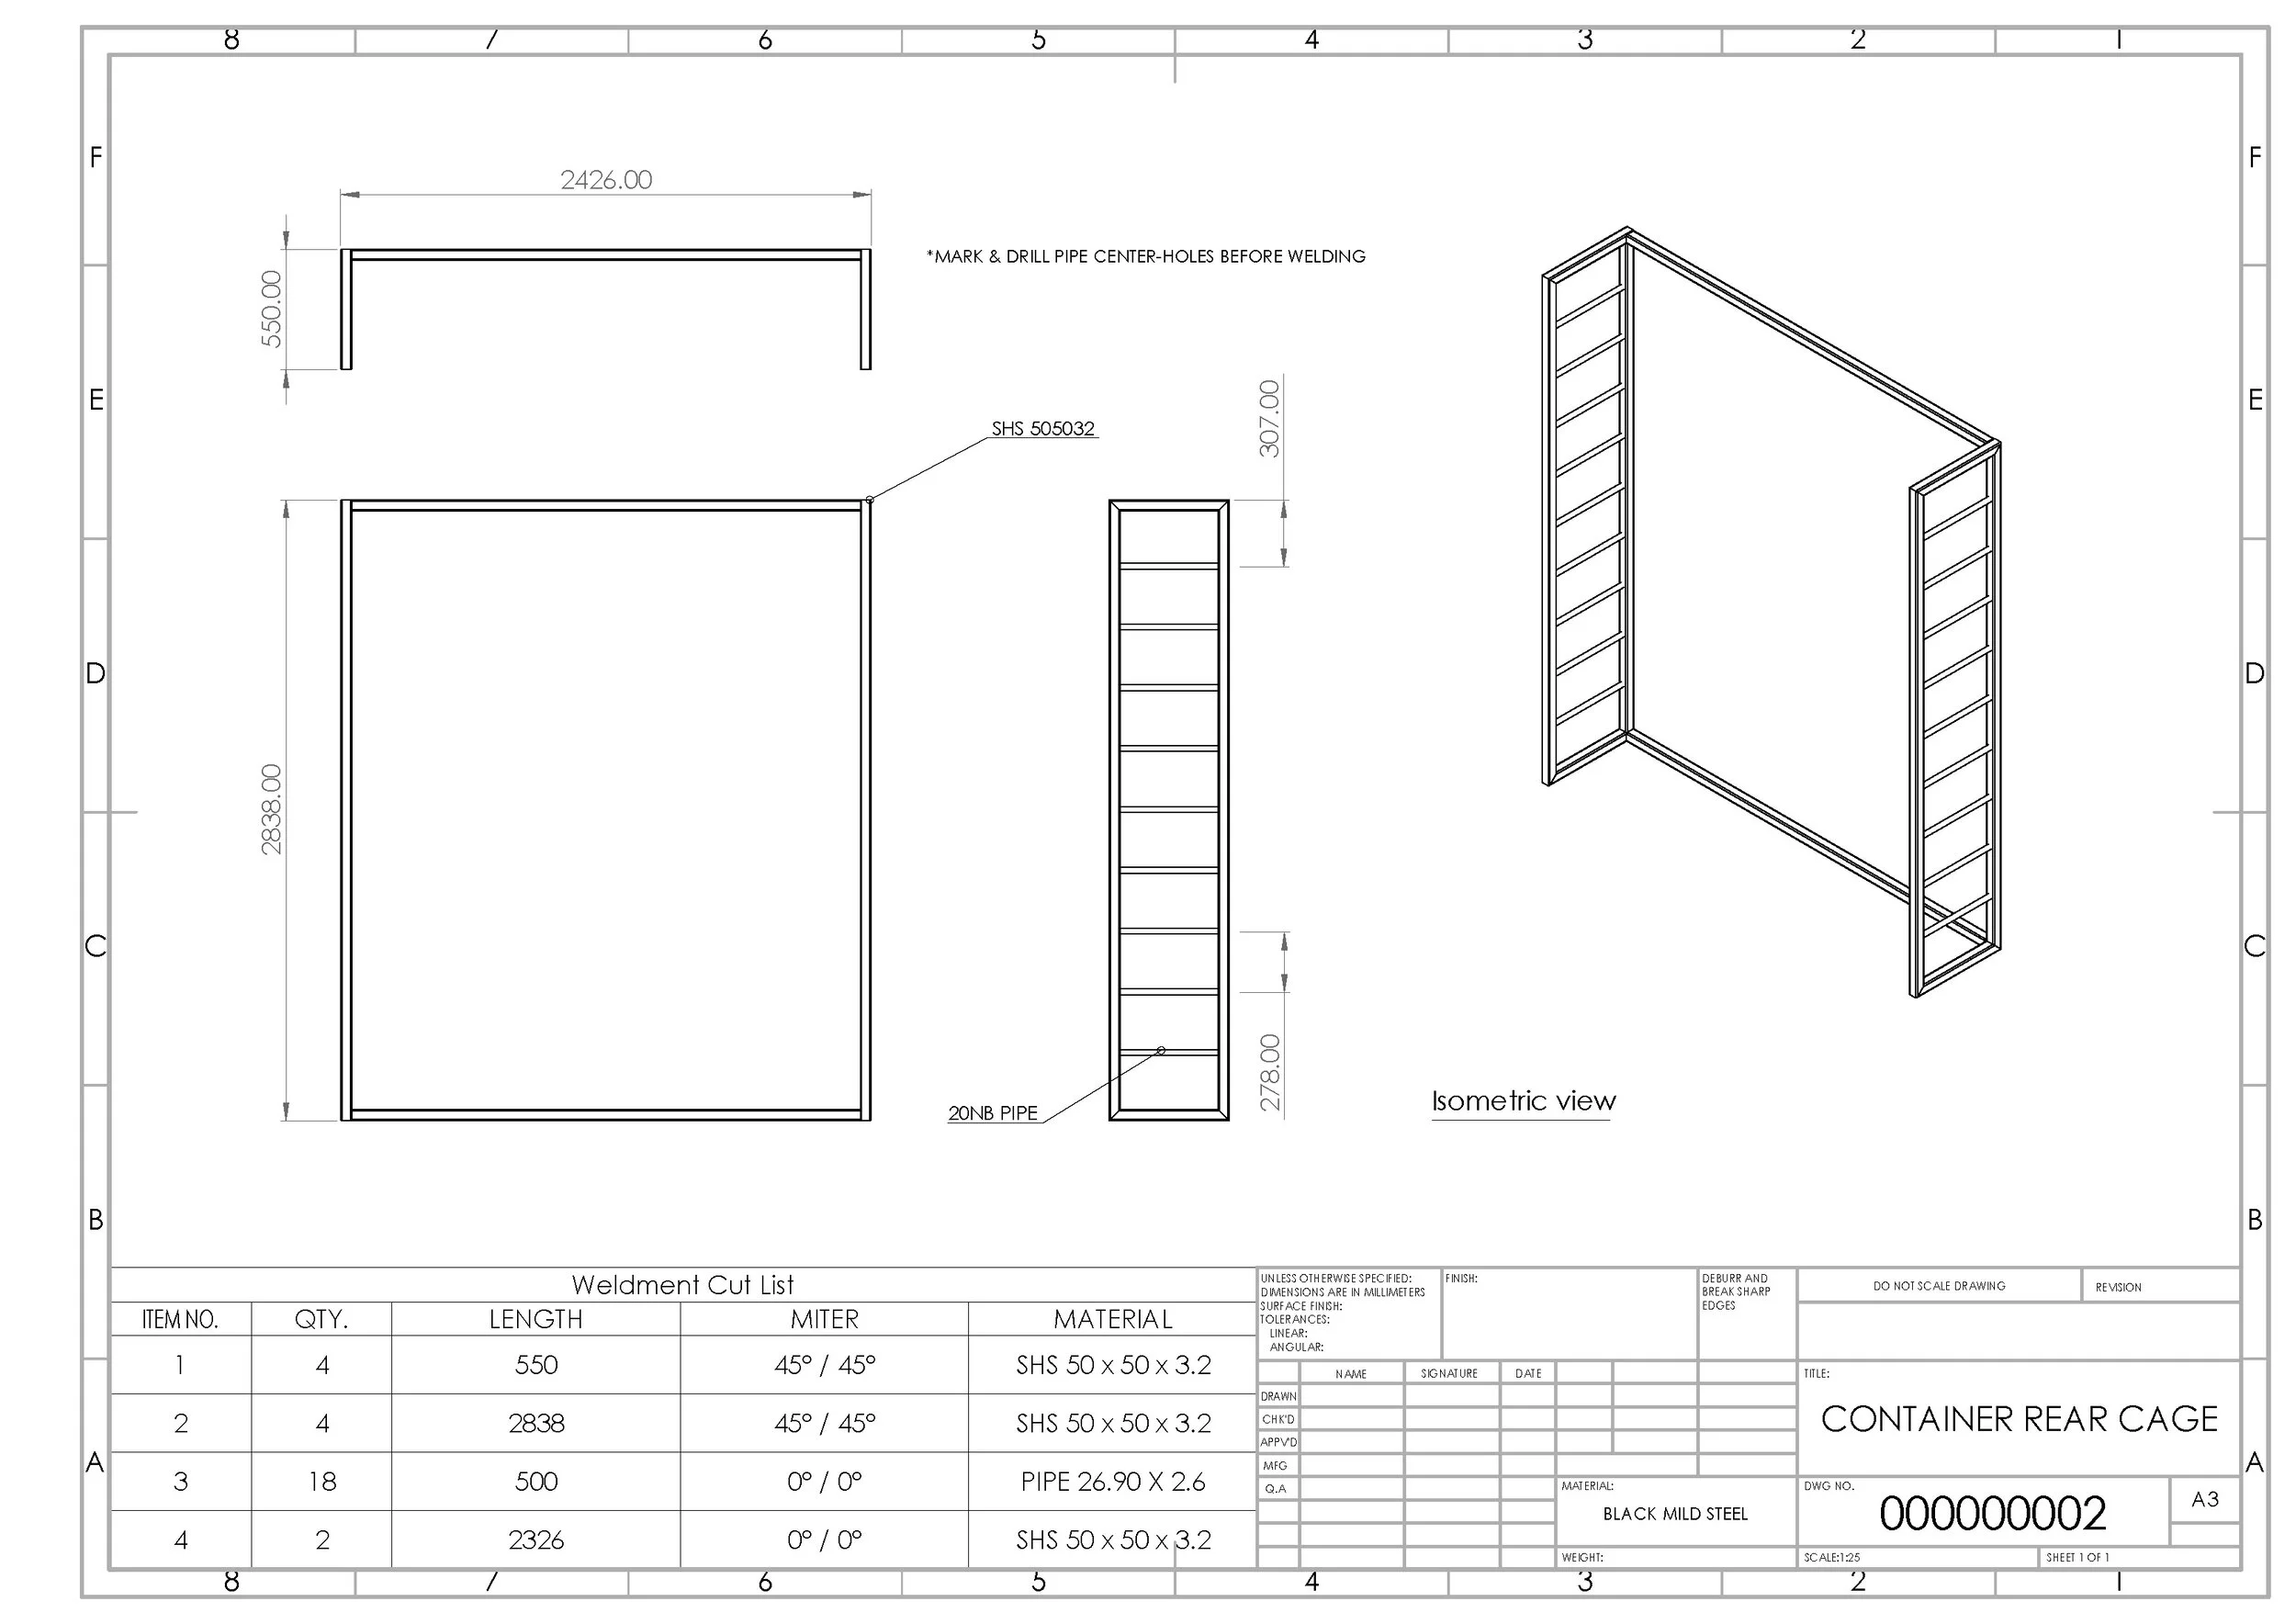
Rear Cage
A recent design update I have been working on is a rear external cage/screen to house the power, solar, a/c and antennae units cleanly. It is of a fairly basic construction that has gone through several iterations and I have attached a drawing below. As always it is slightly out of date due to last minute design changes during fabrication (overall dims/ladder bars > louver). The design consists of a cage spanning the entire rear face with both insulated louver sidewalls and a perforated roller shutter for max ventilation, the cage is erected in 4 separate sections and fastened with universal container bridging clamps. It is assembled in such a way that all the pieces clamp together to support each other whilst closing off the studs to make it secure and tamper-proof.


This cage will now be incorporated across all the containers which will free up space and allow more design freedom. For the darkroom; all the plumbing, tank, power, heating and gas can be externalised (as opposed to partitioned off inside the container) allowing me to fit yet another enlarger :)
Health
Just a general update on my health situation; I am actually writing this on the way to what is hopefully the final appointment with my neurosurgeon. It has been 6 months since brain surgery, I got an MRI last week and hopefully nothing has grown back and all is good. In another 6 months I should be able to drive again after 2 or so years not being behind the wheel - I have taken up cycling as my main mode of transportation and hope to go bikepacking in the near future all good fun. Thats all for the moment, uni is still online and the internal walls/insulation are coming this month so stay tuned for the interior fit out…